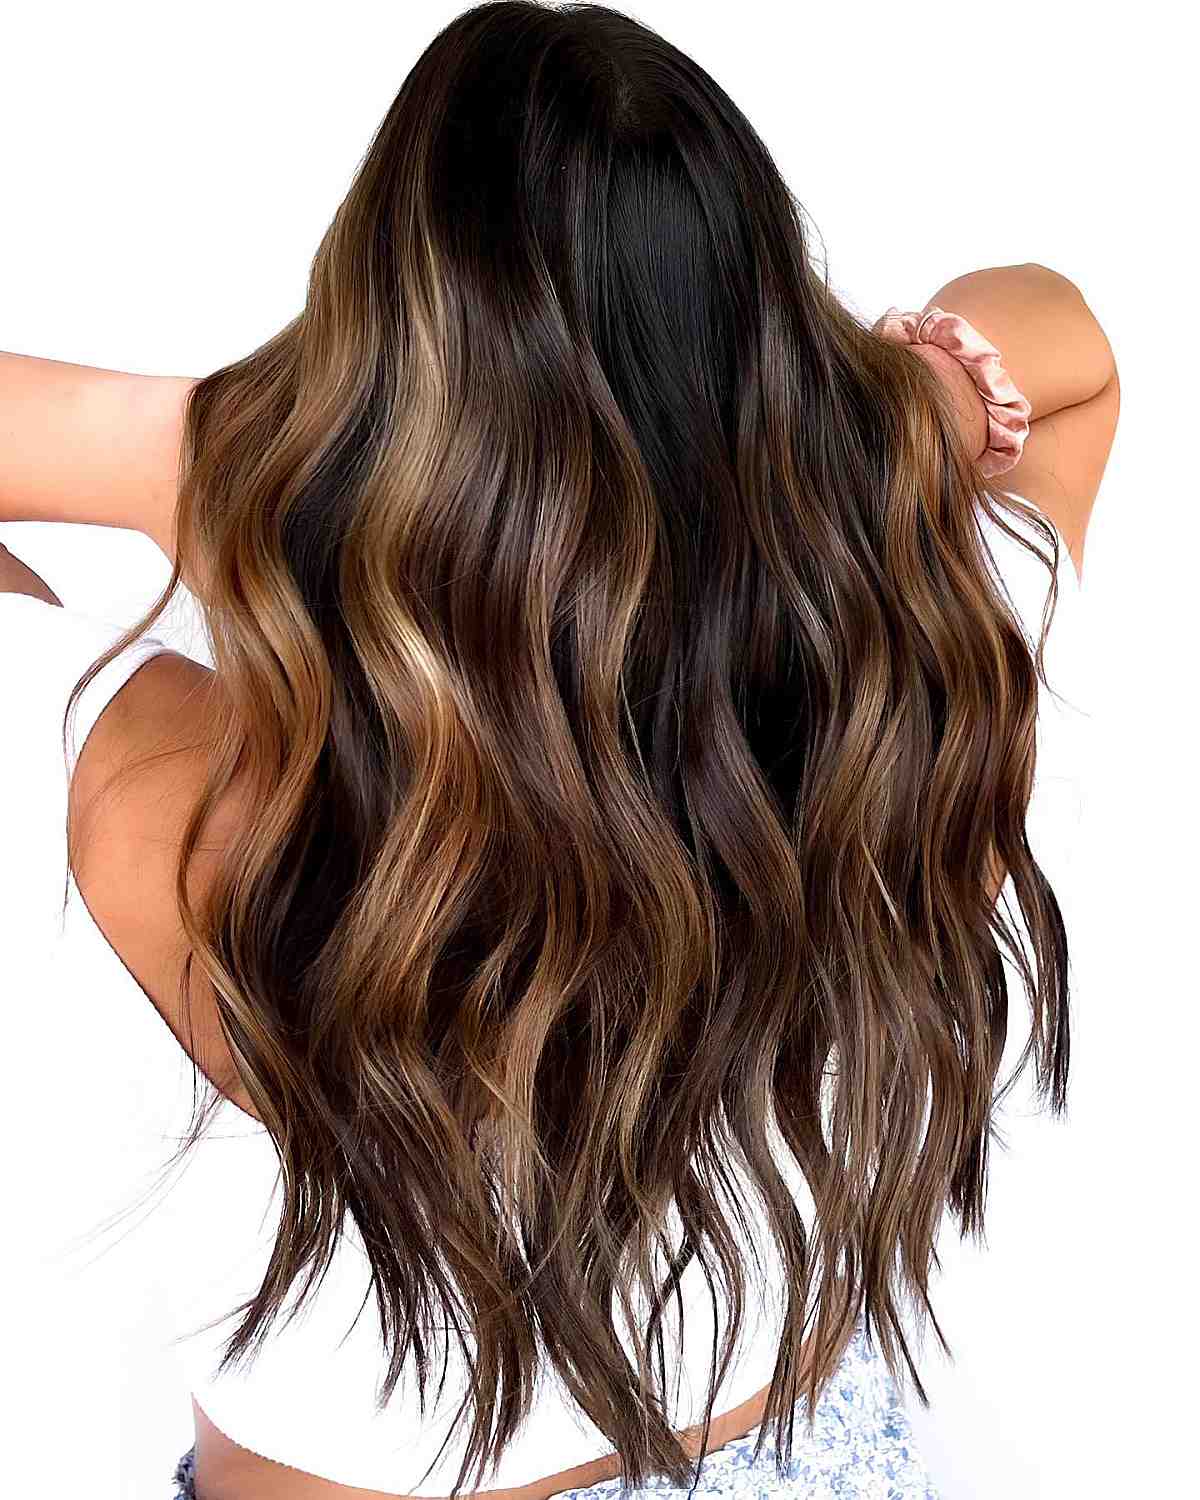
Okay, so I’ve been wanting to change up my hair for a while now, and I finally took the plunge. I went for something that’s been on my radar for ages: dark brown with caramel highlights. Let me tell you, it was quite the process, but so worth it in the end!
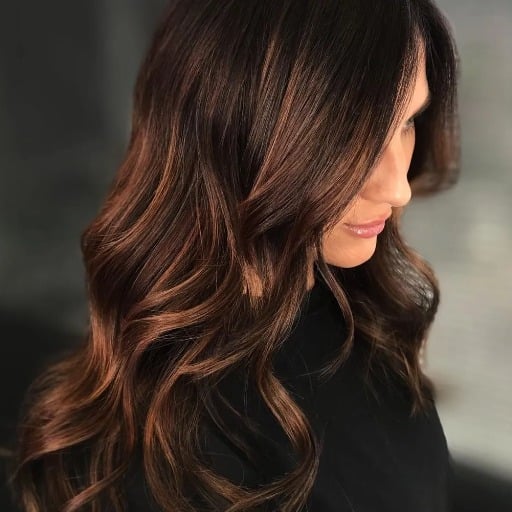
First off, I gotta say, I was nervous. I’ve had my natural dark brown hair for years, and messing with it felt like a big deal. But I’ve always been drawn to those warm, golden tones that just scream “sun-kissed.” So, I did a ton of research, like, hours of scrolling through photos, trying to find the perfect look. I even asked my friends. It needed to look natural, you know? Not too flashy or over-the-top.
I finally booked an appointment with a stylist who seemed to know her stuff. We had a good long chat about what I wanted. I showed her some of the pictures I’d saved, and we talked about my skin tone and all that. She explained that caramel highlights would work well because I have a warm undertone to my skin. It’s a bit on the olive side. She said the warm tones of caramel would add some nice depth and dimension, which was exactly what I was going for.
Then came the actual process. She started by sectioning off my hair. She had to choose the right pieces to lighten, making sure they would frame my face nicely. She used this technique, weaving the color through sections of my hair. It took a while, let me tell you! I sat there with the foils in, feeling like a robot, but trying to trust the process.
After what felt like forever, she washed out the color and started styling. As she was blow-drying my hair, I started to see the magic happen. Those caramel highlights were popping against my dark brown base, and it looked amazing! The color was subtle, but it made such a difference. It gave my hair that sun-kissed effect I’d been dreaming of, without being too dramatic.
- Consultation: We discussed the look I wanted and whether it would suit me.
- Sectioning: She carefully selected the strands of hair to highlight.
- Lightening: She applied the color, focusing on areas around my face and throughout the lengths.
- Toning: This step was crucial to get that perfect caramel shade.
- Styling: Finally, she blow-dried and styled my hair, revealing the final look.
Here’s a quick rundown of the process:
Honestly, I’m so happy with how it turned out. It’s a subtle change, but it’s made a huge difference in how I feel about my hair. It’s like my natural color, but just… better. If you’re thinking about getting caramel highlights, I say go for it! Just make sure you find a stylist you trust, and don’t be afraid to communicate exactly what you want. You won’t regret it!