Okay, so, I wanted to try out a basic eyeliner look today. Nothing too fancy, just something to define my eyes a bit. I’m not exactly a pro at this, so it was a bit of an adventure.
First off, I grabbed my pencil eyeliner. I find a pencil to be the easiest to use when you start. Also, I heard somewhere that using a powder eyeliner is way more natural and soft, but I don’t have it. So I decided to just use my old pencil.
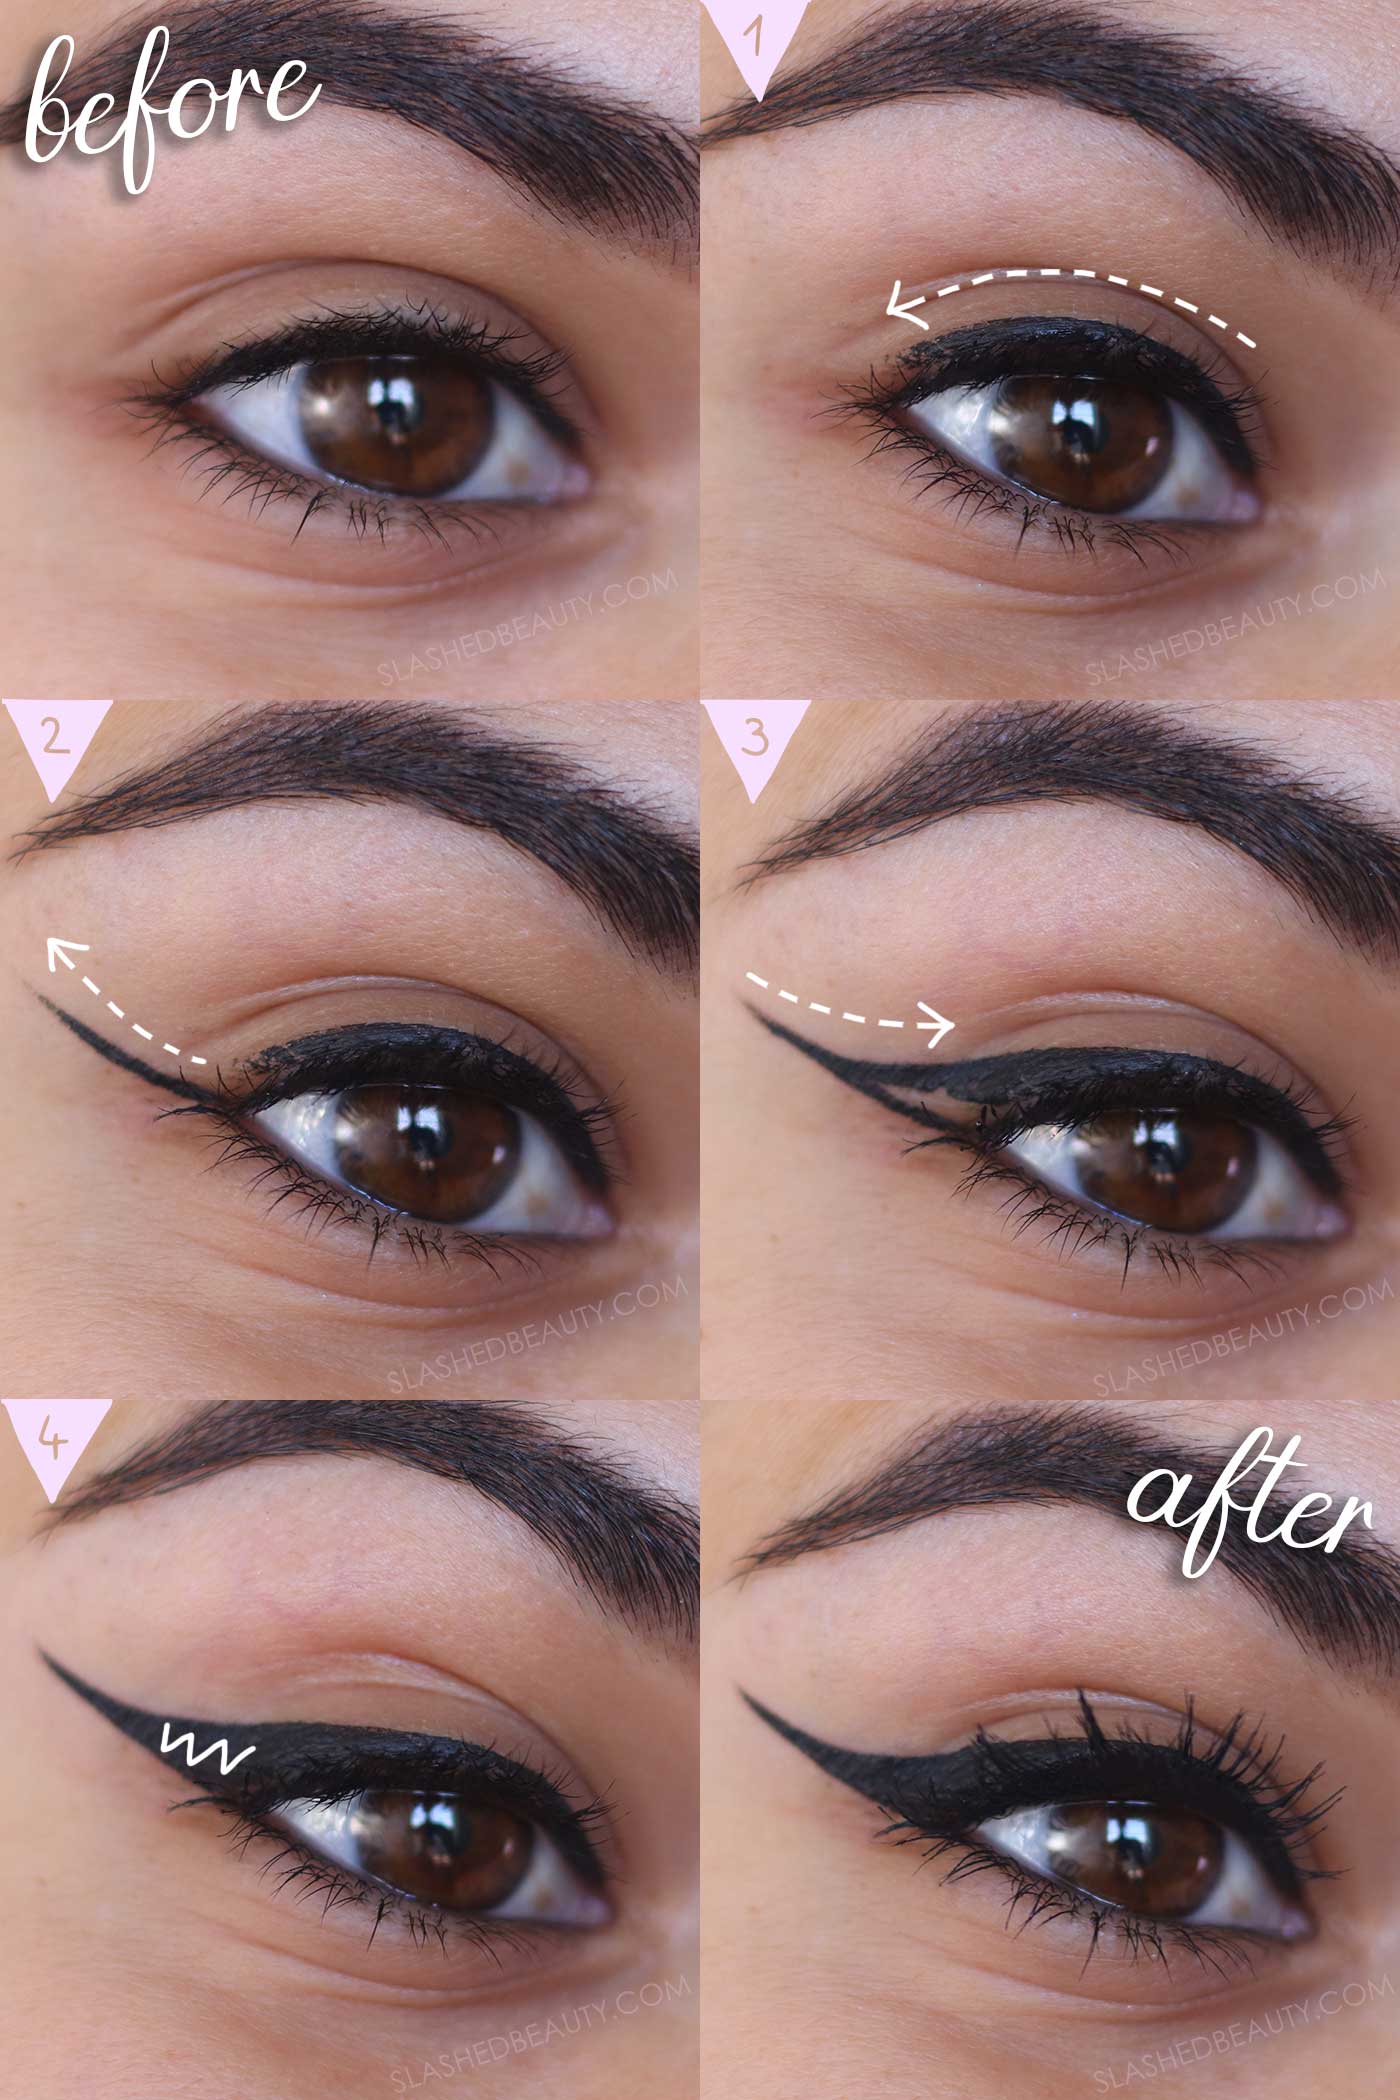
I started by drawing a thin line along my upper lash line. I tried to get as close to the lashes as possible. It was a little shaky at first. I kept stopping and starting, trying to make it even. It took a few tries, but eventually, I got a somewhat decent line going. I did it slowly, bit by bit, to avoid making a mess.
- Then came the tricky part – the wing. I’ve always struggled with getting my wings to match. I decided to start with a small flick at the outer corner of my eye. I angled it slightly upwards, following the natural curve of my lower lash line. It was so hard!
- Once I had a basic shape, I carefully connected it back to the line I had already drawn on my upper lid. One side is okay, but the other is a bit thicker than I wanted. But hey, that’s how you learn right?
- I kind of messed up a few times. I had to use a cotton swab dipped in makeup remover to clean up the edges and fix some smudges. My hands were a bit shaky. I guess I need more practice, and also, I think a thinner eyeliner tool will be better.
After what felt like forever, I finally had both eyes done. They weren’t perfectly symmetrical, but they were close enough. It’s a more natural look than I expected, but I do like it.
It definitely took longer than I thought it would. There was a lot of trial and error involved. I learned that you really need a steady hand for this. Also, next time, I think I will be starting with the wing part first, I heard from somewhere it will be much easier. Overall, it wasn’t a total disaster. I’d give myself a solid B- for effort. I’ll keep practicing, and hopefully, I’ll get better with time. Maybe one day I’ll even be able to do a proper cat-eye!